
Orders
Purpose
This guide walks through the process for searching orders, reviewing order information, viewing catalog and truck details, reallocating truck quantities, reviewing order history, and generating Truck Allocation Reports within the Food Distribution module.
Step-by-Step Instructions
Searching for Orders
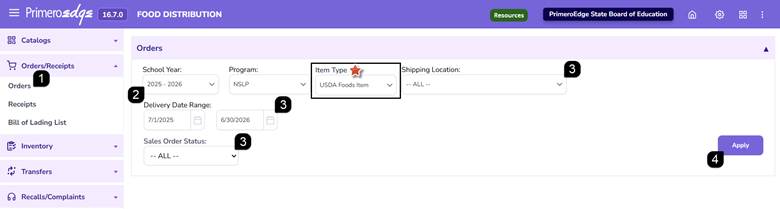
- Navigate to the Food Distribution module > Orders/Receipts > Orders page.
- Select the School Year and Program.
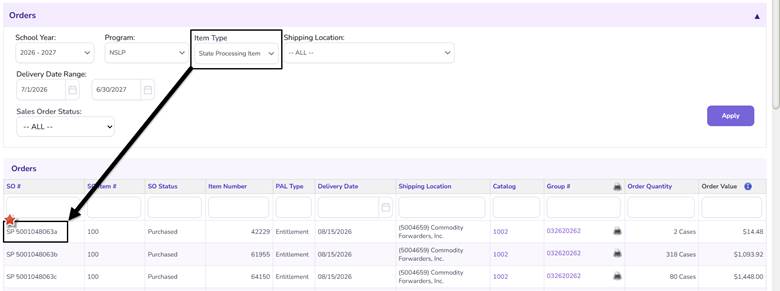
Note: Item Type is available and a required filter if State Processing is utilized by the State Agency and the corresponding system settings have been enabled.
- Optionally, select the Shipping Location, set a Delivery Date Range, and Sales Order Status.
- Click Apply to display orders based on the selected filters.
Reviewing Order Results
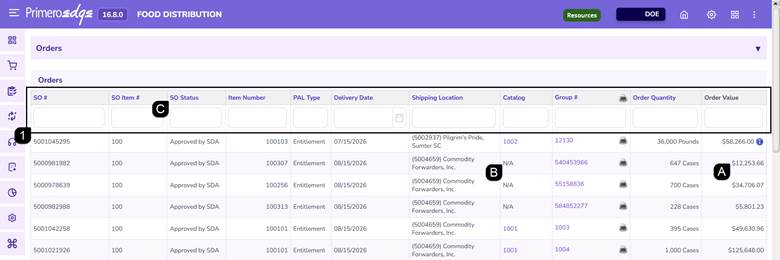
- Use the search fields or column headers to locate and sort order information as needed.
- Review the orders displayed within the Orders table.
- Order Value is automatically calculated using the Order Quantity multiplied by the Value per Case or Pound.
- Orders displaying N/A in the Catalog column originated directly from WBSCM and are not associated with a completed catalog.
- Sales Order status is updated when WBSCM Response Files and Order State Report files are uploaded.
Note: State Processing Item Sales Orders begin with SP to identify State Processing inventory if State Processing is utilized by the State Agency and the corresponding system settings have been enabled.
Viewing Catalog Information
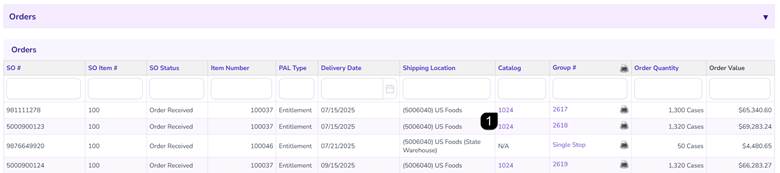
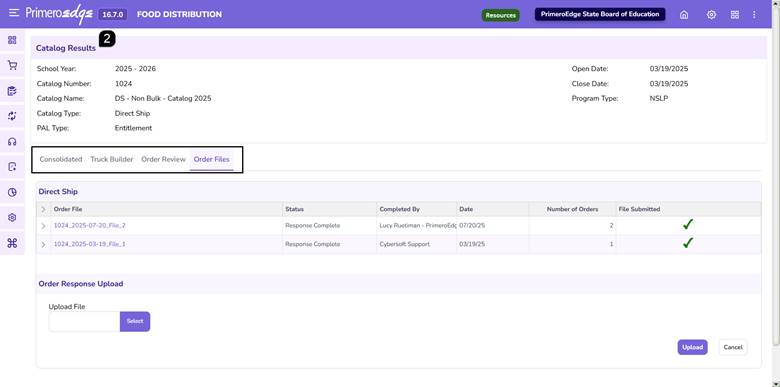
- Select the Catalog Number hyperlink to open the completed catalog associated with the order.
- Review the catalog details and tabs with details as well as the associated order files.
Viewing Truck Details
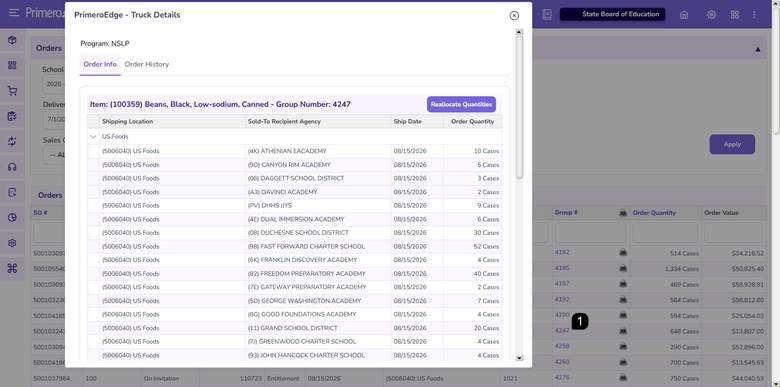
- Select the Group Number hyperlink to open the Truck Details window.
- Review the Recipient Agency orders and shipment information associated with the truck.
Reallocating Truck Quantities
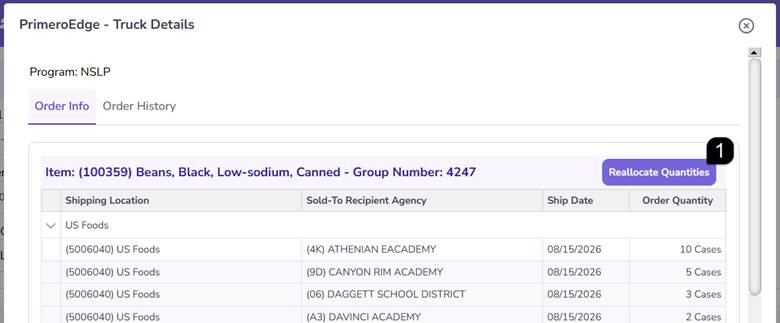
- From Truck Details, click Reallocate Quantities.
Note: Reallocate Quantities is available for all order statuses except Order Received.
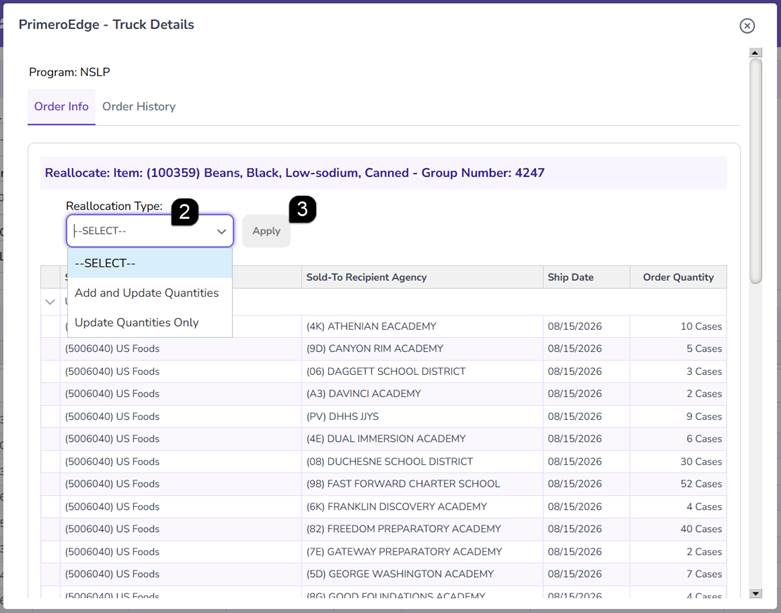
- Select either Add and Update Quantities or Update Quantities Only from the Reallocation Type dropdown.
- Click Apply.
REALLOCATE QUANTITIES: Adding and Updating Quantities
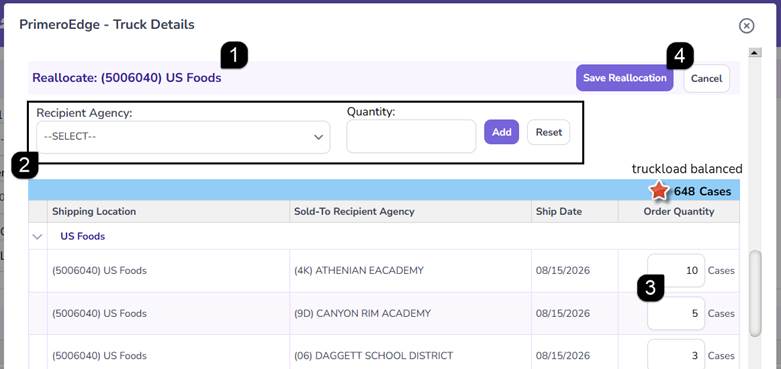
- Scroll down to the Reallocate shipping location section.
- Select the Recipient Agency, enter the quantity, and click Add. Continue adding Recipient Agencies as needed.
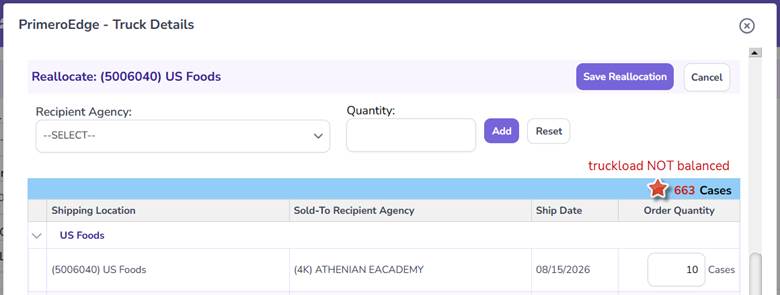
- Adjust quantities in the table and ensure that the truck load is balanced.
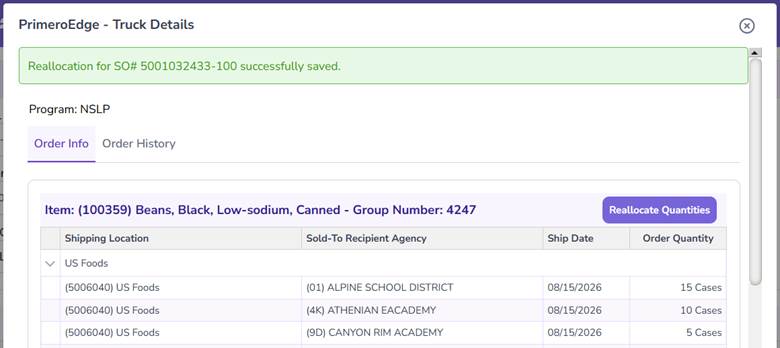
- Click Save Reallocation when all adjustments are complete.
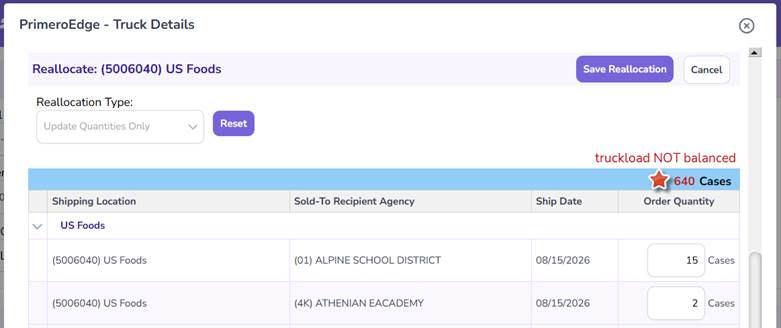
Note: The truck load must remain balanced before the reallocation can be saved successfully. A red text truck load amount indicates the truck is NOT balanced. A black text truck load amount indicates the truck is balanced.
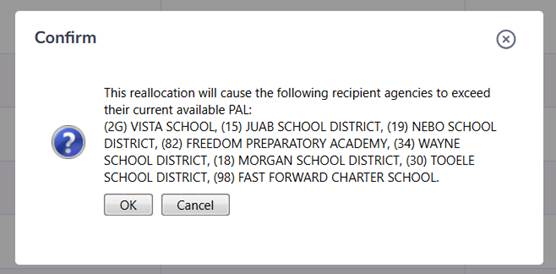
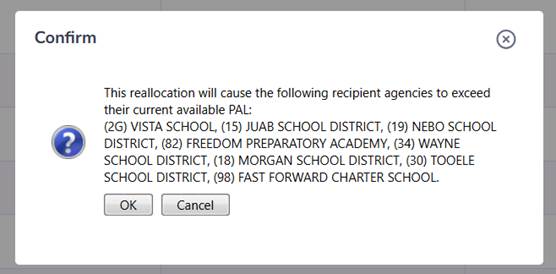
Note: A popup message will appear if the reallocation causes any recipient agencies to exceed their current available PAL. Clicking Ok will allow the allocation to move forward.
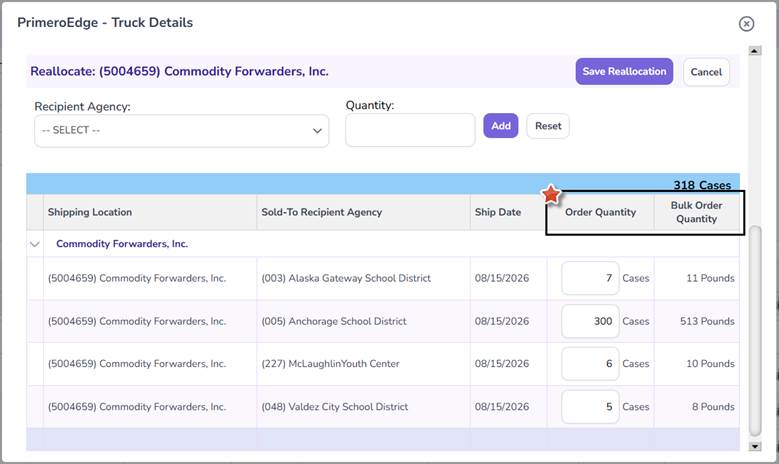
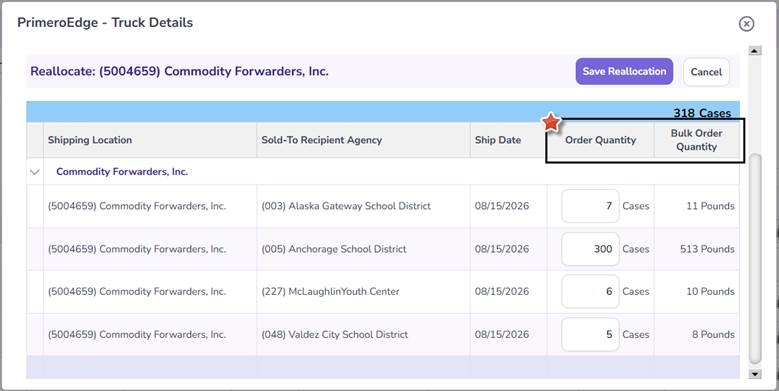
Note: If State Processing is utilized by the State Agency and the corresponding system settings have been enabled, State Processing Truck Details will include Order Quantity and Bulk Order Quantity. Only Order Quantity is available to edit during reallocation.
REALLOCATE QUANTITIES: Updating Quantities Only
- Scroll down to the Reallocate shipping location section.
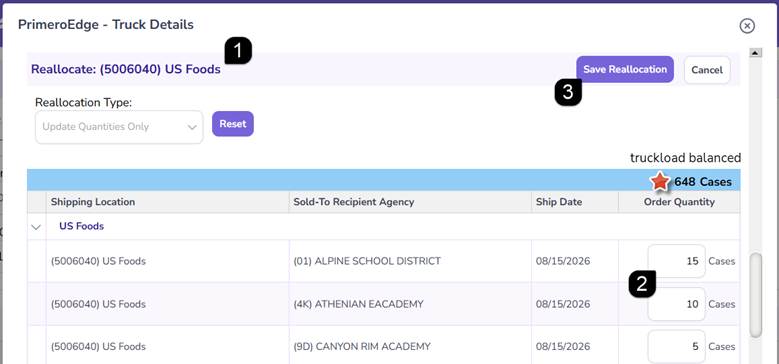
- Modify the existing Recipient Agency quantities as needed.
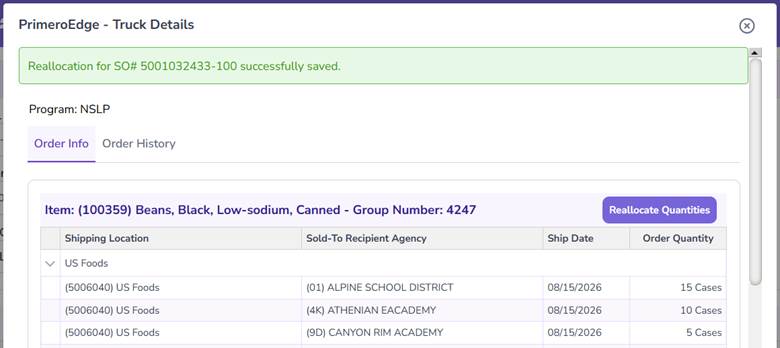
- Verify the truck load remains balanced and click Save Reallocation.
Note: The truck load must remain balanced before the reallocation can be saved successfully. A red text truck load amount indicates the truck is NOT balanced. A black text truck load amount indicates the truck is balanced.
Note: A popup message will appear if the reallocation causes any recipient agencies to exceed their current available PAL. Clicking Ok will allow the allocation to move forward.
Note: If State Processing is utilized by the State Agency and the corresponding system settings have been enabled, State Processing Truck Details will include Order Quantity and Bulk Order Quantity. Only Order Quantity is available to edit during reallocation.
Reviewing Order History
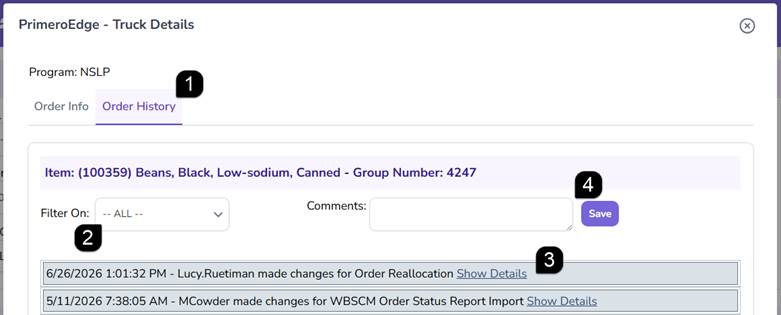
- Open the Truck Details window by clicking on the Group Number hyperlink and select the Order History tab.
Review historical changes, comments, and reallocation activity associated with the order.
- Use the Filter On option to narrow the list of Order History records.
- Use the Comments box to add notes to the Order History records and click Save.
- Additional details may be viewed using the Show Details hyperlink.
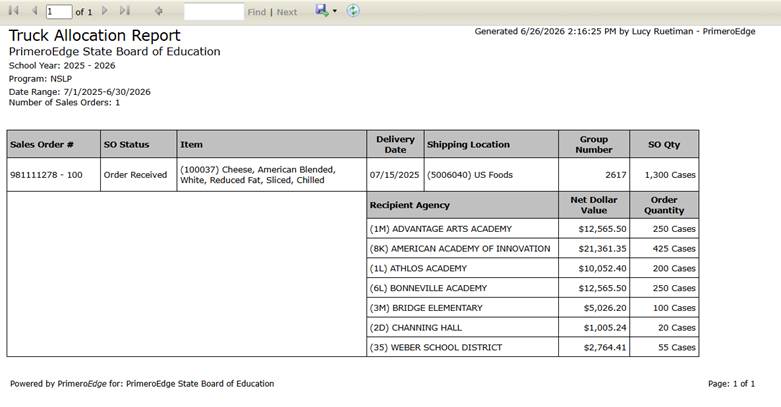
Generating a Truck Allocation Report
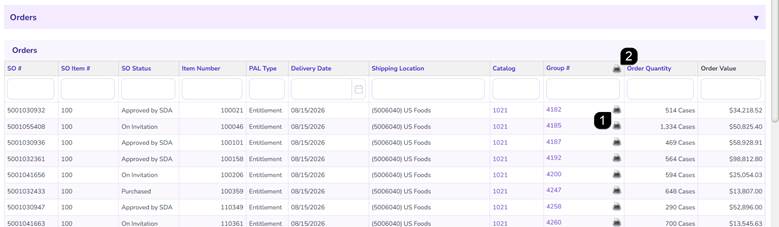
- Select the Printer icon for an individual order to generate a Truck Allocation Report.
- Select the Printer icon in the Orders page header to generate a Truck Allocation Report with all the orders on the table based on the selected filters.
- Review, save, or print the report as needed.
FAQs
Q: Why does an order display "N/A" for Catalog?
A: Orders displaying "N/A" were entered directly into WBSCM and are not associated with a Completed Catalog.
Q: Why can't I see the Reallocate Quantities option?
A: Reallocation is not available after an order reaches Order Received status.
Q: What does the red Truck Load value mean?
A: The truck load is not balanced to the Full Truck Load (FTL) quantity.
Q: What does the black Truck Load value mean?
A: The truck load reallocation is balanced and ready to save.