
Receipts
Purpose
This guide walks through the process for searching receipts, reviewing receipt details, editing receipt information, generating receipt reports, and manually adding receipts within the Food Distribution module.
If the State Agency receipts orders in WBSCM: Receipts automatically populate with info from Sales Orders in Received status that are updated as part of the OSR import and WBSCM Sales Order Import.
If the State Agency receipts order in PrimeroEdge: Receipts for Sales Orders in Received status can be manually added within the system and the receipt information can be exported to WBSCM.
Step-by-Step Instructions
Searching for Receipts
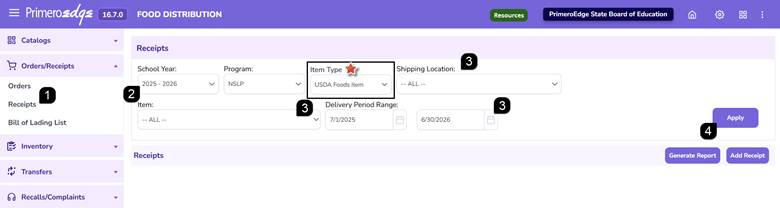
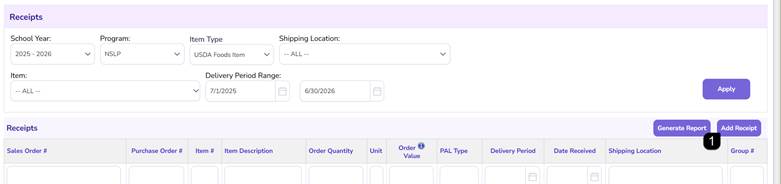
- Navigate to the Food Distribution module > Orders/Receipts > Receipts page.
- Select the School Year and Program.
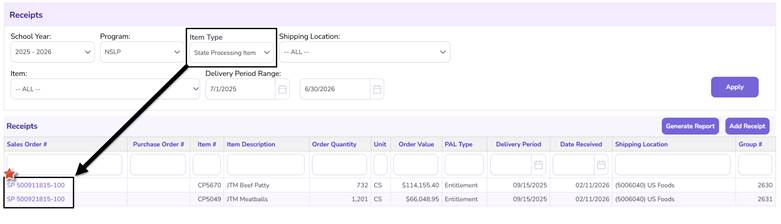
Note: Item Type is available and a required filter if State Processing is utilized by the State Agency and the corresponding system settings have been enabled.
- Optionally, select the Shipping Location, and adjust the Delivery Date Range.
- Click Apply to display receipts based on the selected filters.
Reviewing Receipt Results
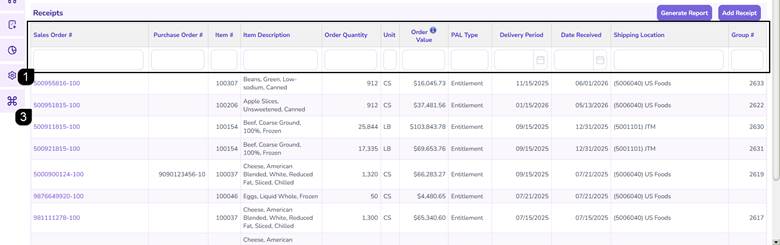
- Use the search fields or column headers to locate and sort receipt information as needed.
- Review the receipts displayed within the Receipts table. Receipt results display order, item, quantity, value, and delivery information.
- Select the Sales Order Number hyperlink to review receipt details.
Note: State Processing Item Sales Orders begin with SP to identify State Processing inventory if State Processing is utilized by the State Agency and the corresponding system settings have been enabled.
Viewing Receipt Details
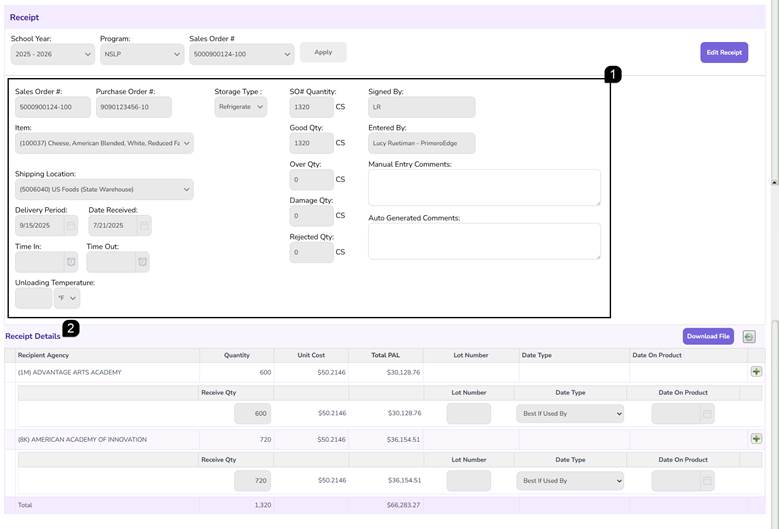
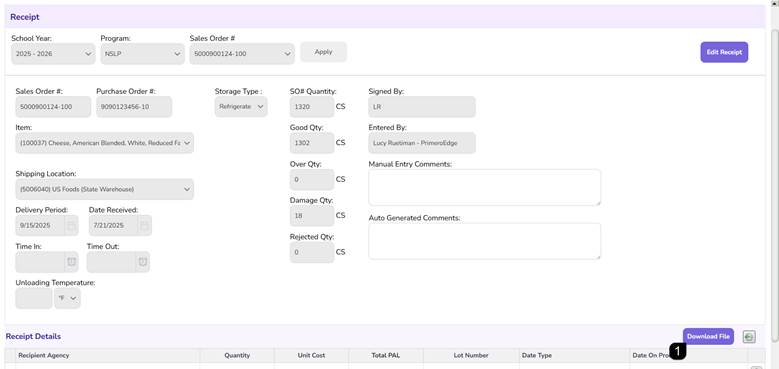
- Review the entered receipt information including Sales Order Number, Purchase Order Number, Item, Shipping Location, Delivery Date, Quantity Information, and receipt comments.
- Review the Receipt Details section to view Recipient Agency quantities, unit costs, PAL values, lot numbers, and product date information.
Note: Receipt Details display information for each Recipient Agency associated with the receipt.
Editing a Receipt
- Open the desired receipt and click Edit Receipt.
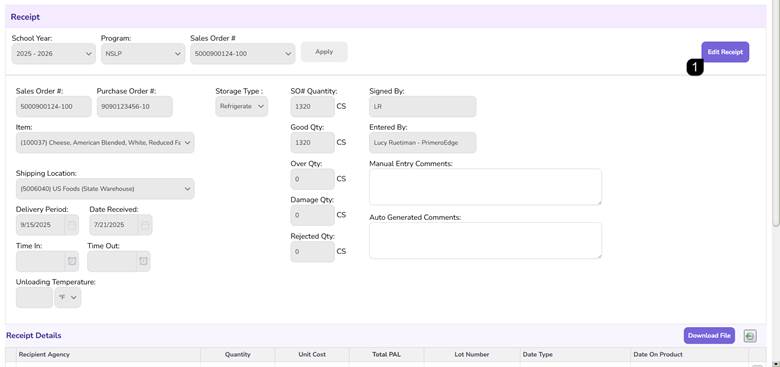
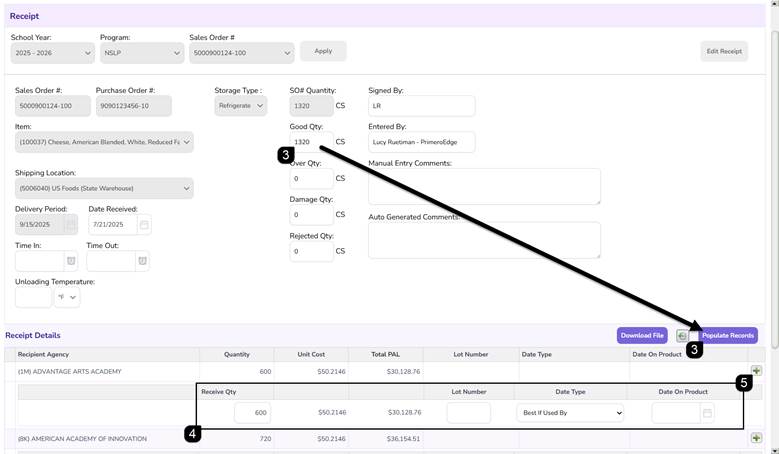
- Update the receipt information not grayed out as needed, including Date Received, Time Information, Unloading Temperature, Quantity Information, Signed By, Entered By, or Comments.
- If Good Quantity is modified, click Populate Records to update Recipient Agency quantities.
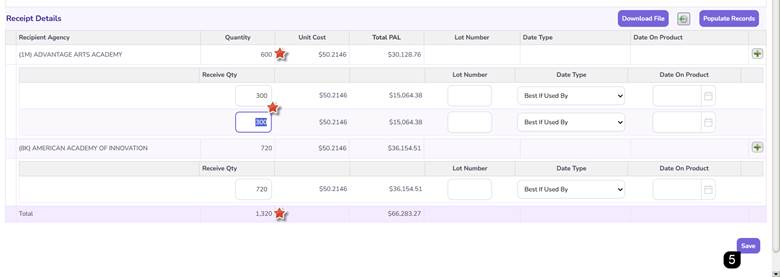
- Update lot numbers, product dates, or receipt quantities within the Receipt Details section.
- Additional lot number or product date records may be added using the Plus (+) icon.
Note: Receipt quantities may be split across multiple lot numbers or product dates when needed.
Note: Recipient Agency quantities must be reviewed and adjusted after updating the Good Quantity value.
- Click Save to complete the receipt update.
Generating a Receipts Report
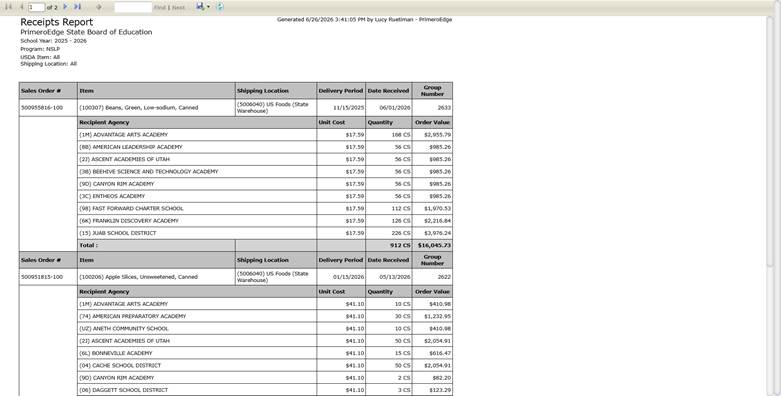
- After applying the desired filters on the Receipts page, click Generate Report.
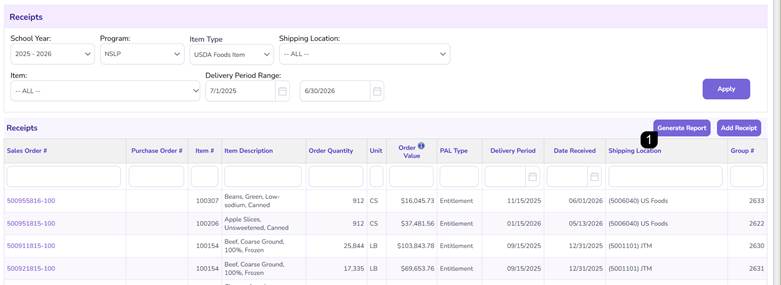
- Review, save, or print the generated report.
Note: The Receipts Report displays a summary view of the receipts currently displayed on the Receipts page.
Manually Adding a Receipt
- From the Receipts page, click Add Receipt.
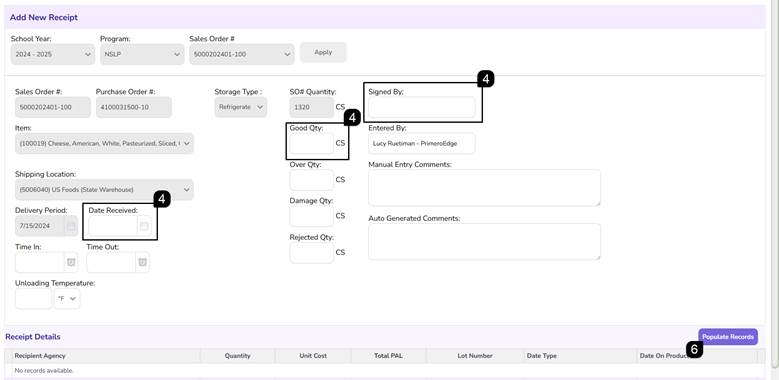
- Select the applicable School Year, Program, and Sales Order Number.
- Click Apply.

- Enter the required receipt information, including Good Quantity, Date Received, and Signed By.
- Optionally, enter Time Received, Temperature Information, Over Quantity, Damaged Quantity, Rejected Quantity, and Comments.
- Click Populate Records to create the Recipient Agency receipt records.
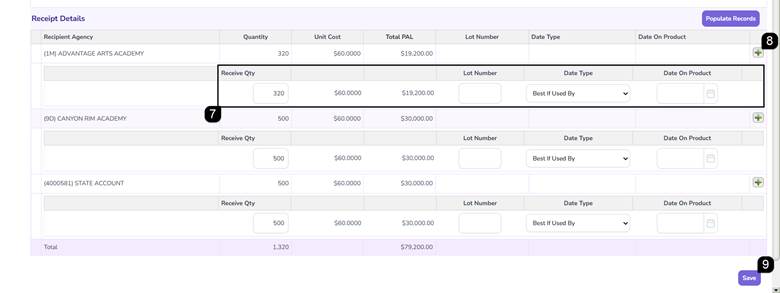
- In the Receipt Details section verify the Recipient Agency Receive Quantities, Lot Numbers, product date information, and any additional receipt details.
- Use the Plus (+) icon to add additional lot number or product date records if needed.
- Click Save to complete the receipt.
Note: Unit Cost and PAL values populate automatically based on the receipt quantity entered.
Downloading a Receipt Export File
- Open the desired receipt record and click Download File.
Note: The export file is generated in .CSV format and contains details from the receipt. The exports can be imported into WBSCM if that follows the State Agency process.
FAQs
Q: When do I need to click Populate Records?
A: Populate Records updates Recipient Agency quantities after receipt quantity changes have been made. This could be when entering a new receipt or editing a receipt.
Q: Can I enter multiple Lot Numbers for the same Recipient Agency?
A: Yes. Use the Plus (+) icon to add additional rows for multiple Lot Numbers or Product Dates. Be sure to split the item quantity as appropriate.
Q: What format is the Receipt Export file that can be imported into WBSCM?
A: The export downloads as a CSV file.