
Invoices
Purpose
This guide walks through the process for searching invoices, reviewing invoice details, adjusting invoice quantities, and viewing invoice adjustment history within the Food Distribution module. Invoices may be reviewed for Distributors, Processors, or Recipient Agencies.
Step-by-Step Instructions
Searching for Invoices
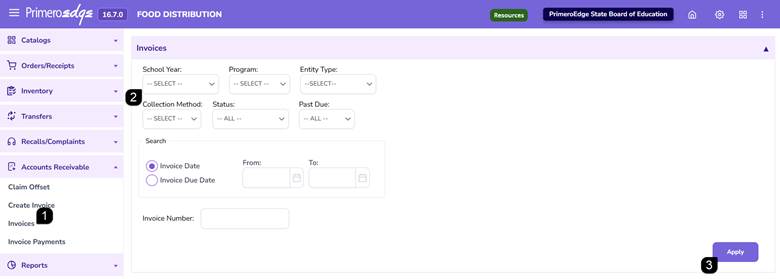
- Navigate to the Food Distribution module > Accounts Receivable > Invoices page.
- Select the applicable School Year, Program, and Entity Type. Select the remaining invoice criteria that will populate based on the selected Entity Type.
- Enter any additional search criteria and click Apply.
Note: Available search options vary based on the selected Entity Type.
Note: Invoice Types are set up in Configuration > Invoice Types. Revisit configuration if the invoice type needed is not listed.
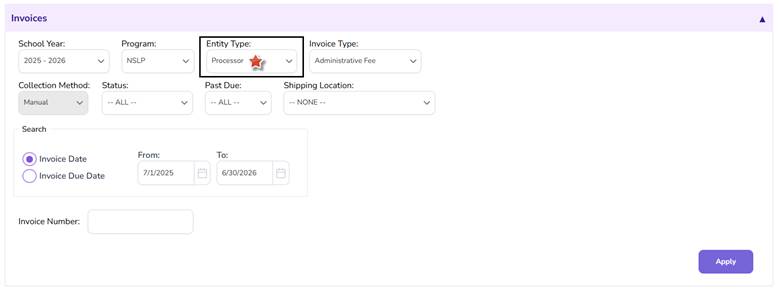
Note: Distributor and Processor invoices may be filtered by Invoice Type, Status, Past Due indicator, Shipping Location, date range, and Invoice Number.

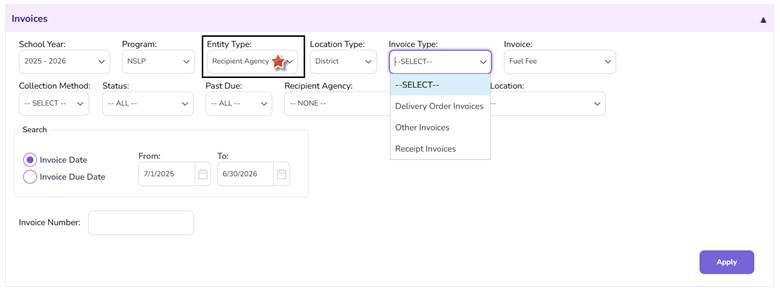
Note: Recipient Agency invoices may be searched by District or Region location type, Recipient Agency, invoice status, shipping location, date range, and Invoice Number.
Note: Other Invoice is used for manually created invoices. Receipt Invoice automatically creates invoices from Sales Orders in Order Received status. Delivery Order Invoice creates invoices from Delivery Order activity.
Reviewing Invoice Results
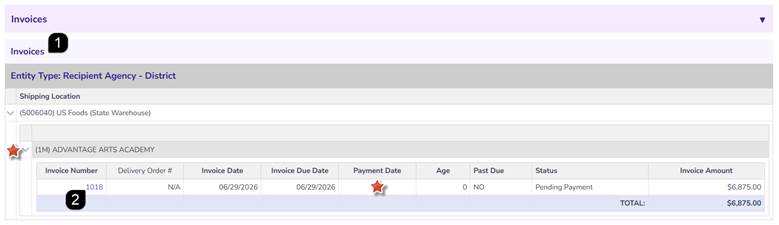
- Review the invoices displayed within the Invoices results table. Review invoice information including Invoice Number, Invoice Date, Due Date, Payment Date, Age, Status, and Invoice Amount.
- Select the Invoice Number hyperlink to open the invoice.
Note: Payment Date is displayed only for invoices that have been paid.
Note: Use the arrows to expand or collapse invoice information.
Reviewing & Adjusting Invoice Details
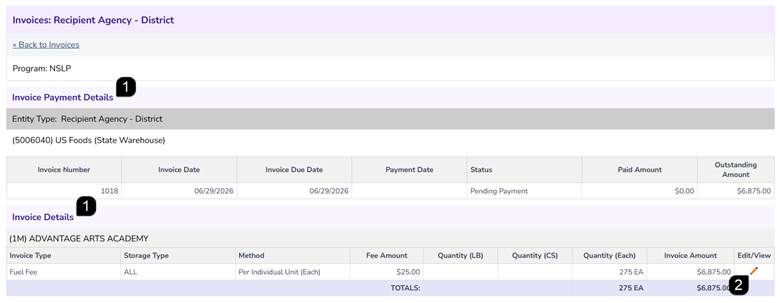
- Review the Invoice Payment Details and Invoice Details sections for the selected invoice.
- To modify an invoice line, click the Pencil icon.
Note: Invoice Details display invoice quantities, fee amounts, invoice amounts, and outstanding balances.
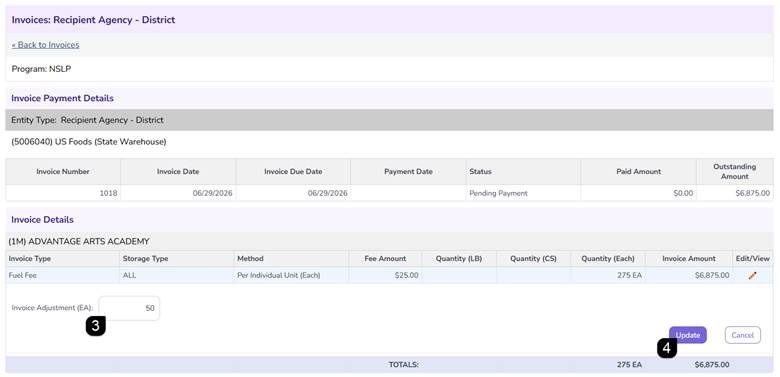
- Enter the adjustment quantity in the Invoice Adjustment field.
Note: Positive values increase the invoice quantity and negative values decrease the invoice quantity.
- Click Update to save the adjustment.
Reviewing Invoice Adjustment History
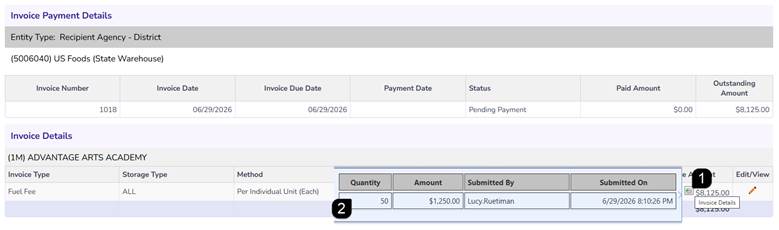
- Click the History icon next to the invoice amount.
- Review the adjustment history information displayed.
Note: Invoice history displays previous quantity adjustments, adjustment amounts, submission dates, and the user who performed the adjustment.
Note: Additional quantity adjustments may be entered directly from the Invoice Details page.
FAQs
Q: Can I reduce an invoice quantity?
A: Yes. Enter a negative number in the Invoice Adjustment field to reduce the invoice quantity.
Q: Can I increase an invoice quantity?
A: Yes. Enter a positive number in the Invoice Adjustment field to increase the invoice quantity.
Q: How do I see previous invoice adjustments?
A: Click the History (Clock) icon displayed next to the invoice amount after adjustments have been made.