
Transfer USDA Foods
Purpose
This guide walks through the process of creating USDA Foods transfers between Recipient Agencies (RAs) including the State Account, between State Agencies, and for Emergency Food uses. This ensures that inventory levels are correctly adjusted across all participating entities and that entitlement usage is properly recorded.
Once created, transfers are viewed and managed in the Transfer List function.
Transfer Type | Definition |
RA to RA Transfers | Allows transfer of Direct Ship or Processed Goods USDA Foods Item from one RA to another. |
State to State Transfers | Allows transfer of Processed Goods USDA Foods Items to/from one State to another. |
Emergency Foods Transfers | Allows transfer out of Direct Ship or Processed USDA Foods Items for utilization by another entity for an emergency event. |
Step-by-Step Instructions
Creating an RA to RA Transfer
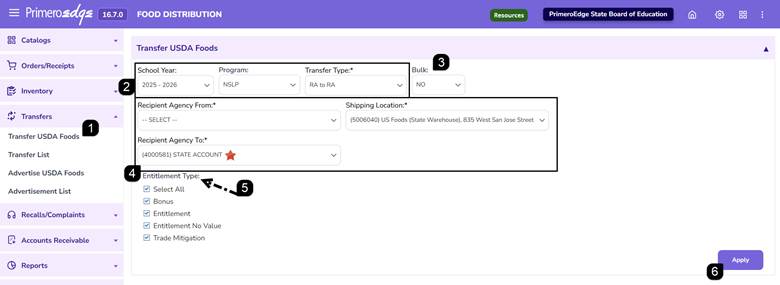
- Navigate to the Food Distribution module > Transfers > Transfer USDA Foods page.
- Select the applicable School Year, Program, and Transfer Type (RA to RA).
- Select Yes or No to indicate if the item being transferred is Bulk.
- Select the Recipient Agency From, Shipping Location, and Recipient Agency To.
Note: The Recipient Agency From or To could be the State Account.
- If the item is Not bulk, adjust the Entitlement Type(s), as needed.
- Click Apply to display available items.
RA to RA: Non-Bulk Item Transfer
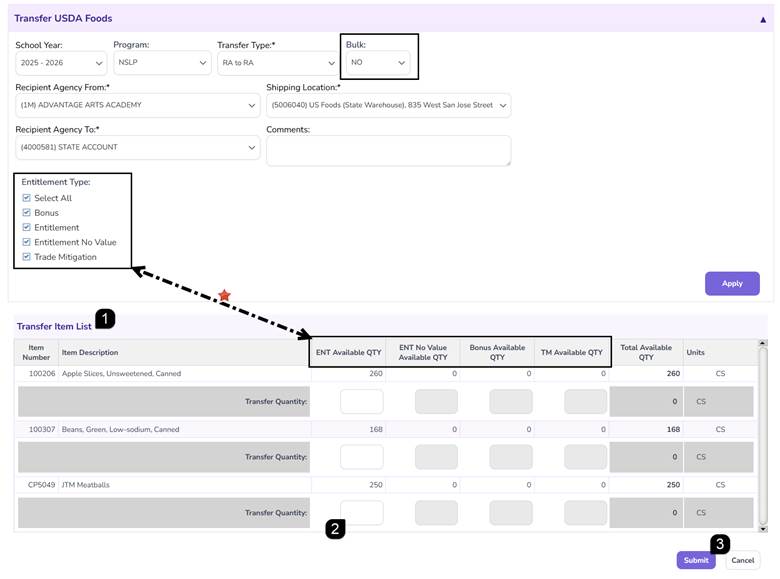
- View the Transfer Item List and the quantities available for each item and entitlement type.
Note: The Entitlement Types that are displayed in the table are determined by the Entitlement Type selections in the search.
- Enter the quantities to transfer.
- Click Submit.
Note: Transfer quantities must be positive numbers and can only be entered for inventory types with quantities greater than zero.
- Review the green success message and transfer number.
Note: Direct Ship item transfers will begin with a D.

RA to RA: Non-Bulk Item Transfer
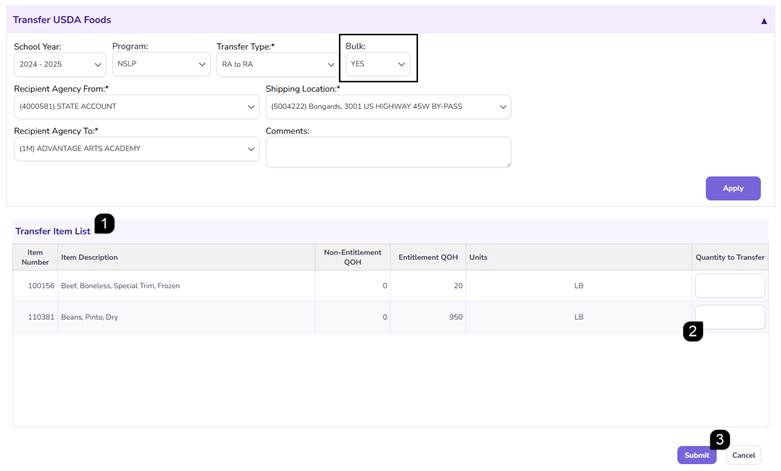
- View the Transfer Item List and the quantities available for each item
Note: Bulk transfers allow entry of a single transfer quantity rather than quantities by entitlement type.
- Enter the quantities to transfer.
- Click Submit.
Note: Transfer quantities must be positive numbers and can only be entered for items with quantities greater than zero.
- Review the green success message and transfer number.
Note: Processed Goods item transfers will begin with a P.

Creating a State to State Transfer
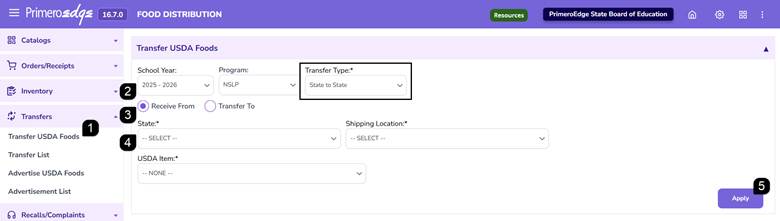
- Navigate to the Food Distribution module > Transfers > Transfer USDA Foods page.
- Select the applicable School Year, Program, and Transfer Type (State to State).
Note: State to State transfers are only available for Processed Goods.
- Indicate whether the transfer is being received from or transferred to another State.
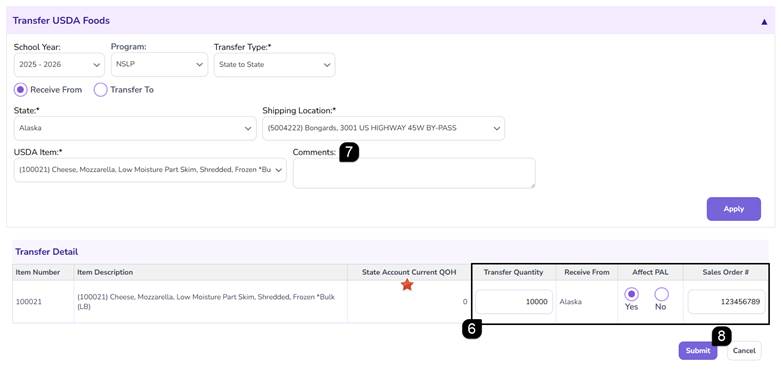
- Select the applicable State, Shipping Location, and USDA Item.
- Click Apply to display transfer details.
- Enter the Transfer Quantity, PAL impact selection, and Sales Order Number.
Note: The State Account Current QOH is your State Agency quantity and could be 0 if you are receiving quantity. Transfer quantities must be positive numbers
- Add Comments, if needed.
- Click Submit.
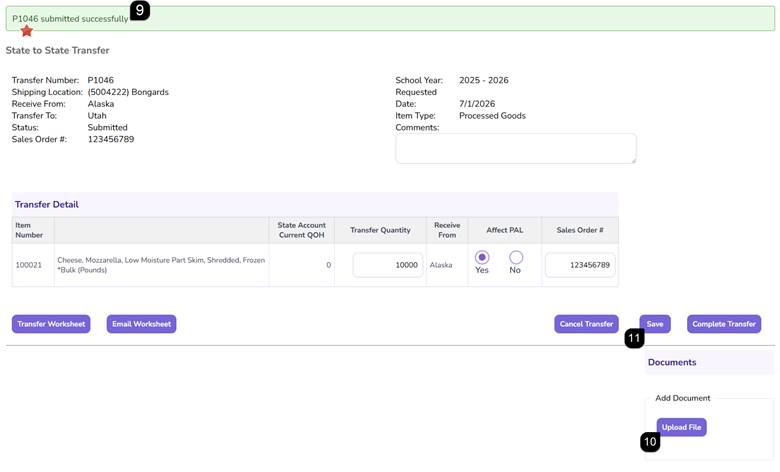
- Review the green success message and transfer number.
Note: State to State transfer can only be for Processed Goods items and transfers will begin with a P.
- Add supporting documentation, if needed.
- Click Save to retain changes.
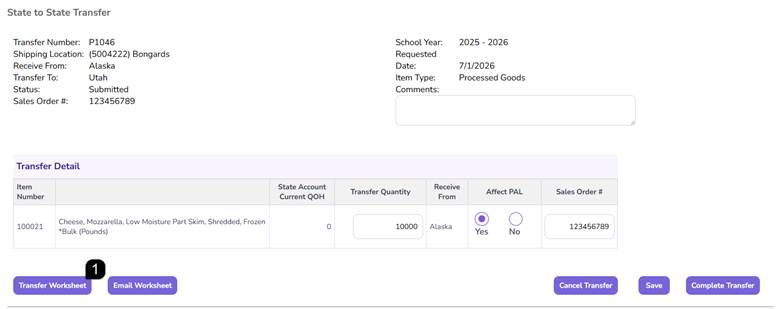
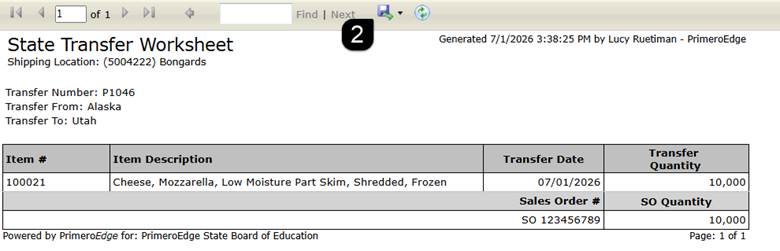
State to State: Generate Transfer Worksheet
- Within the State to State Transfer, click Transfer Worksheet.
- Review, print, and/or save the generated worksheet.
State to State: Email Transfer Worksheet
- Within the State to State Transfer, click Email Worksheet.
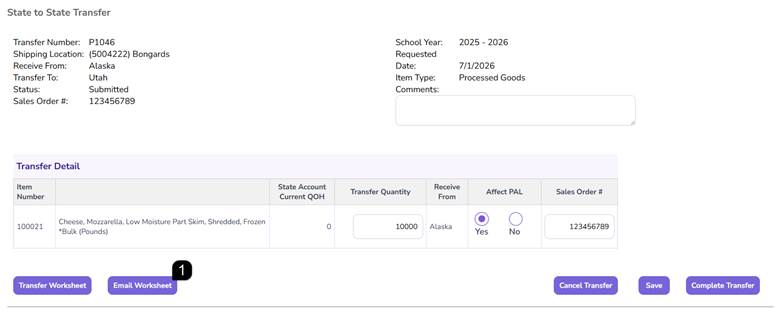
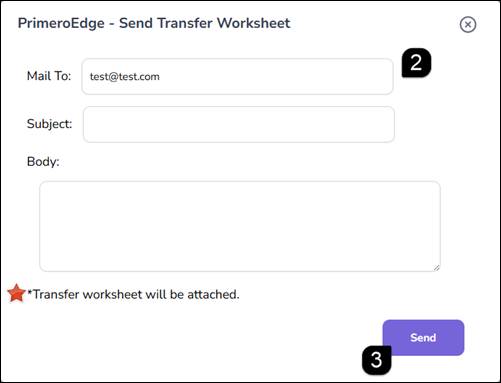
- Enter the recipient email address, subject, and message.
- Click Send.
Note: The transfer worksheet report is automatically attached to the email.
State to State: Completing or Cancelling
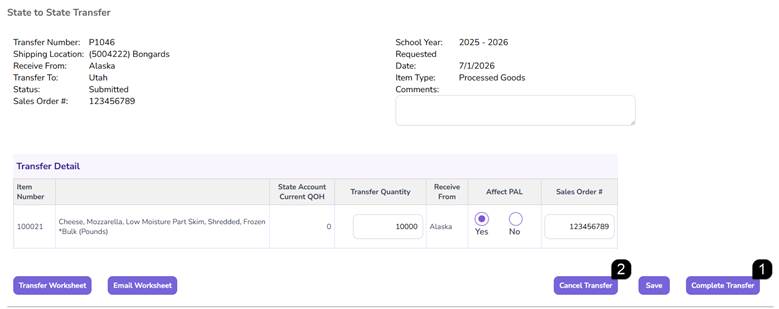
- Click Complete Transfer to finalize the transfer in the system and update inventory.
- Click Cancel Transfer to cancel the transaction completely.
Creating an Emergency Foods Transfer
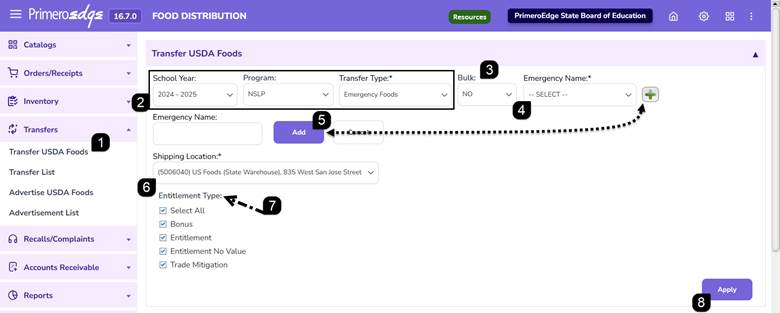
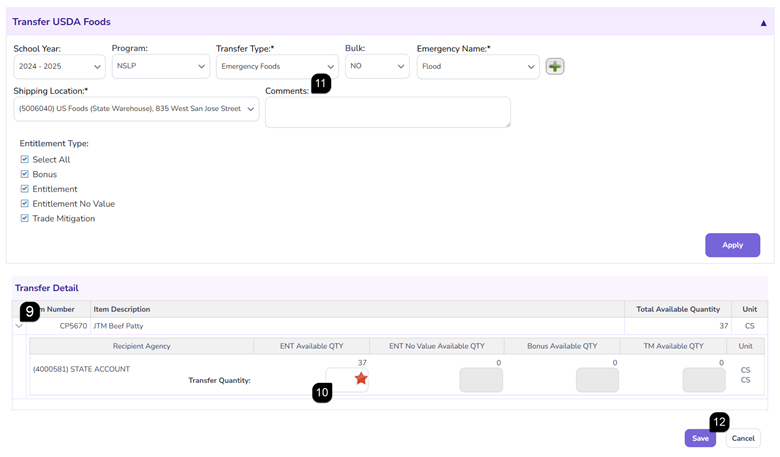
- Navigate to the Food Distribution module > Transfers > Transfer USDA Foods page.
- Select the applicable School Year, Program, and Transfer Type (Emergency Foods).
- Select Yes or No to indicate if the item being transferred is Bulk.
- Select the Emergency Name from the dropdown
- Optionally, create a new Emergency Name using the Add (+) button and clicking Add.
- Select the Shipping Location.
- If the item is Not bulk, adjust the Entitlement Type(s) selections, as needed.
- Click Apply to display available inventory items.
- Expand the desired item using the arrows.
- Enter the transfer quantities.
Note: Transfer quantities can only be entered for inventory types with quantities greater than zero.
Note: The Entitlement Types that are displayed in the table are determined by the Entitlement Type selections in the search. Bulk transfers allow entry of a single transfer quantity rather than quantities by entitlement type.
- Enter Comments, if needed.
- Click Submit.
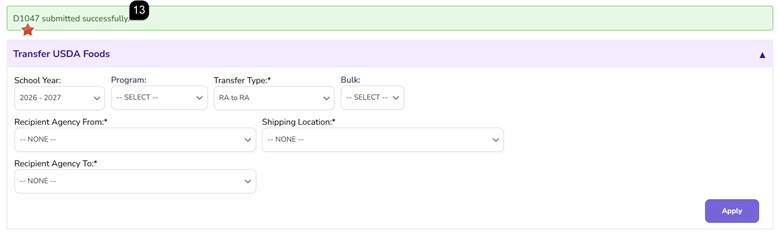
- Review the green success message and transfer number.
Note: Processed Goods item transfers will begin with a P. Direct Ship item transfers will begin with a D.
FAQs
Q: What is the difference between Bulk and Non-Bulk transfers?
A: Non-Bulk transfers allow quantities to be entered by entitlement type, while Bulk transfers use a single transfer quantity.
Q: How are Recipient Agency transfer requests received?
A: Transfer requests generate notifications within My Messages and include a hyperlink to the transfer record.